Step by Step Set Up
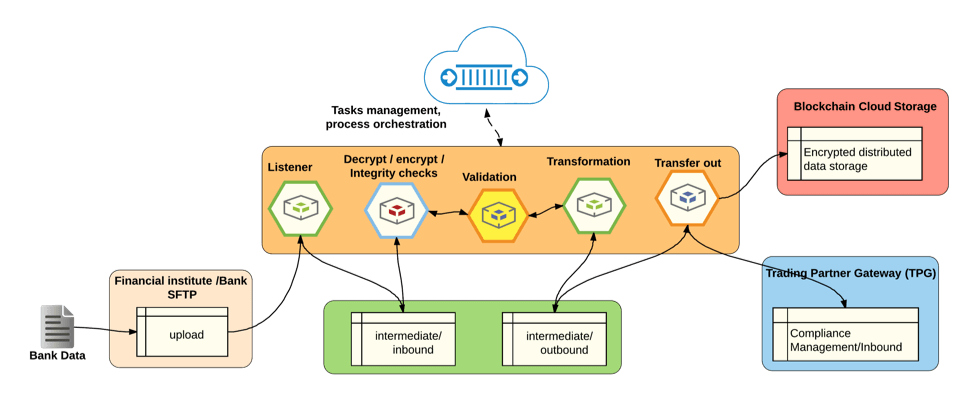
To set up an MFT flow, there are five microservices in total:
*Listener
*Transfer-in
*Transformer
*Transfer-out
*File Error Handler
Let’s see the working principles of all these microservices.
Listener
This microservice will “listen” for certain types of files from a certain folder in a file system. When the user uploads the target file into this folder, the Listener will pick it up and attach a job ID to ensure the file name is a unique identifier during the whole MFT process. After the file has been given the job ID a message, which contains the file information, will be sent to the next microservice which is the Transfer.
Transfer-in
This microservice transfers the file from the source directory into the destination directory. If file security is required, then file encryption and decryption plugin will be used. If the target file needs to be processed in multiple destinations, the Transfer-in microservice will also trigger the copy plugin, and make copies of the target file into multiple destinations.
Transformer
This microservice is capable of providing customized file transformation according to user’s needs. Right now, we have transformations like csv to csv, file to MQ, or other personalized needs. Each transformer will be developed as a pluggable service, and will be called dynamically from a config file based on the needs.
Transfer-out
This microservice transfers the file from our internal sftp server into the destination directory. If file security is required, then file encryption and decryption plugin will be used. If the target file needs to be renamed in the destination, the renaming rule will be defined in the configuration of Transfer-out.
File Error Handler
This microservice will only be triggered if there are errors that happened to the data inside the file. If the Transformer failed to transform a file because of the data inside the file, a message will be sent to the File Error Handler. Since listeners don’t do any data processing of the file, they will never actually send messages to this microservice. However, if something goes wrong in the transformation of this data, the File Error Handler can move the file from the archive folder of the source directory, into the error folder of the source directory. This way, the sender is notified that the file failed in the MFT process and an analysis report will follow.
Set Up
1. Listener:
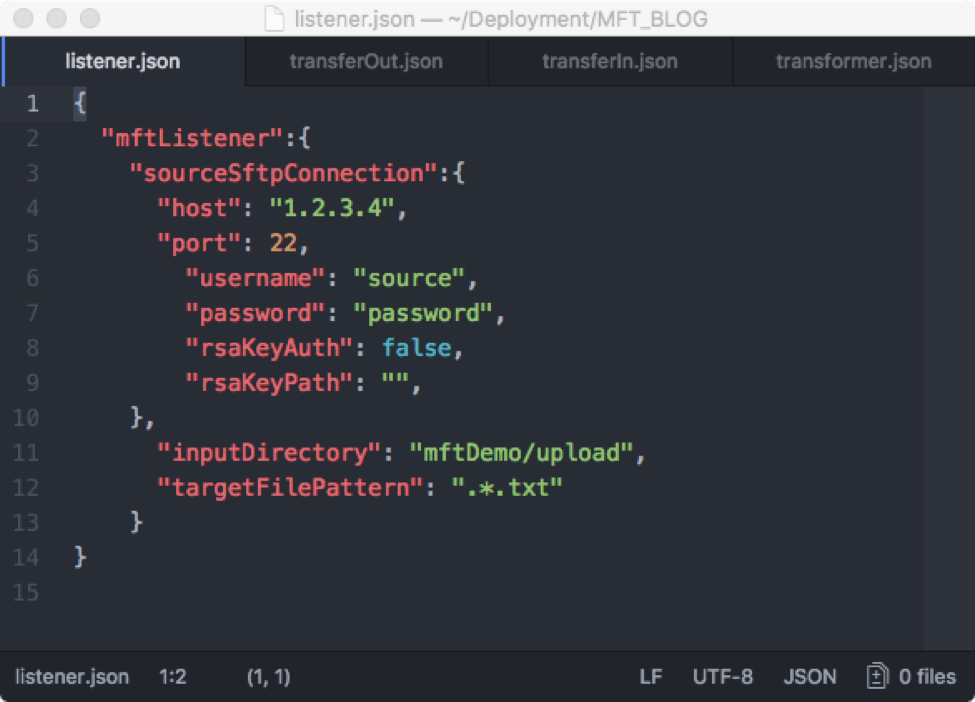
Pick up “.csv” file, from “mftDemo /upload” In the config of the listener, we will provide the information about how to connect to sender’s sftp server, which are hostname, port, username, password, rsaKeyAuth, rsaKeyPath. These 6 parameters will help the microservice to connect to the sender’s sftp server. The “inputDirectory” is the directory which contains the target files. The “targetFilePattern” is the regex to tell the listener microservice how to determine the right name for the target files. In the picture below, host is “1.2.3.4”, port is 22, the username is “source”. If “rsaKeyAuth” is “false”, then “password” will be used, if “rsaKeyAuth” is “true”, the “rsaKeyPath” will be used, and the rsa key should be provided by the sender. After successfully connecting to the sftp server, the Listener will go to “mftDemo/upload” and start to scan files that match the regex defined in “targetFilePattern”, which is “.csv” file.
2. Transfer-in
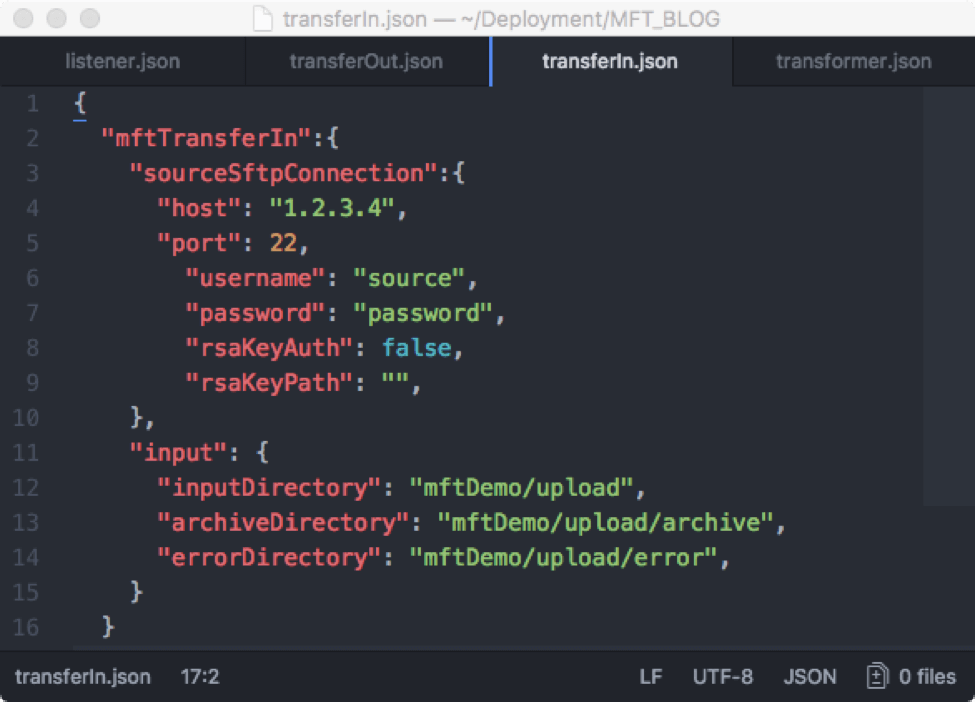
In the config of TransferIn, we will also provide the information about how to connect to the sender’s sftp server, which are hostname, port, username, password, rsaKeyAuth, rsaKeyPath. These 6 parameters will help the microservice to connect to the sftp server. In the picture below, host is “1.2.3.4”, port is 22, the username is “source”. If “rsaKeyAuth” is “false”, then “password” will be used, if “rsaKeyAuth” is “true”, the “rsaKeyPath” will be used, and the rsa key should be provided by the sender. After successfully connect to sender’s sftp server, TransferIn will consume the messages sent from Listener, the message contains the target file name that the Listener scanned, and the target file name will be used for TransferIn microservice to find the target file in the “inputDirectory”. Then, TransferIn will make a copy of the origin file to our internal sftp server to start the transformation process. If the transfer was successful, the original file will be move to “archiveDirectory” which indicates this file transferred successfully.
3. Transformer
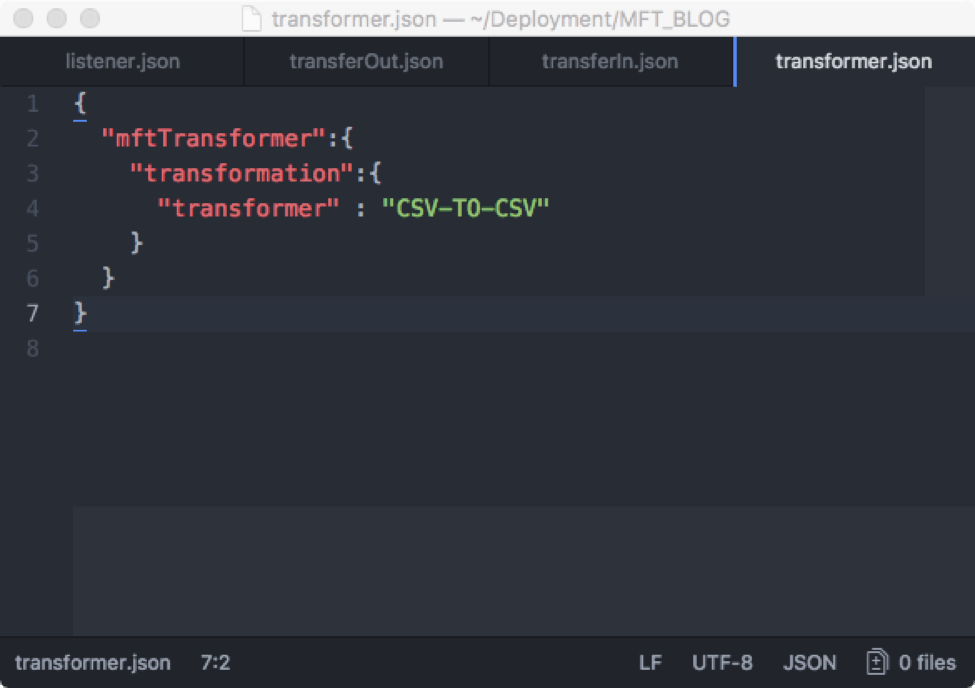
In the config of the Transformer, the user only needs to provide the transformation rules, since the transformation is happening in our internal sftp server everything else is taken care of. In the picture below, the transformation rule is “CSV-TO-CSV”. This transformer will transform a CSV file into another CSV file based on the field mapping rules the user provides.
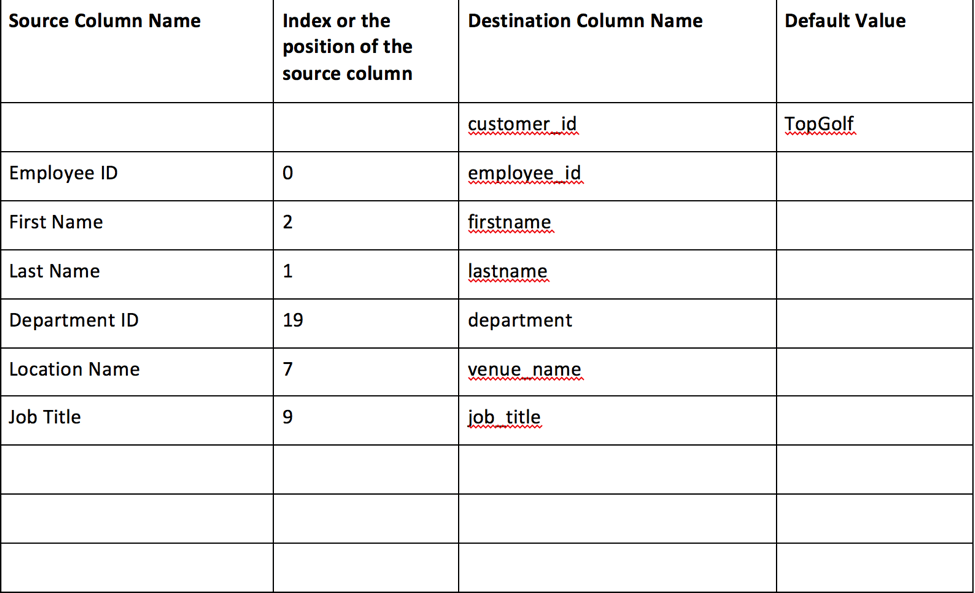
The second image is a sample mapping file. The columns of the transformed file will strictly follow the order in the mapping file below. “Source Column Name” is the name of the column (header) in original file. “Index or the position of the source column” is the index of the header in the original file. “Destination Column Name” is the header name after transformation. “Default Value” is the default value for the corresponding “destination column name”. If the “default value” is not provided, then the original value from the “source column name” will be used in the transformed file.
4. Transfer-out
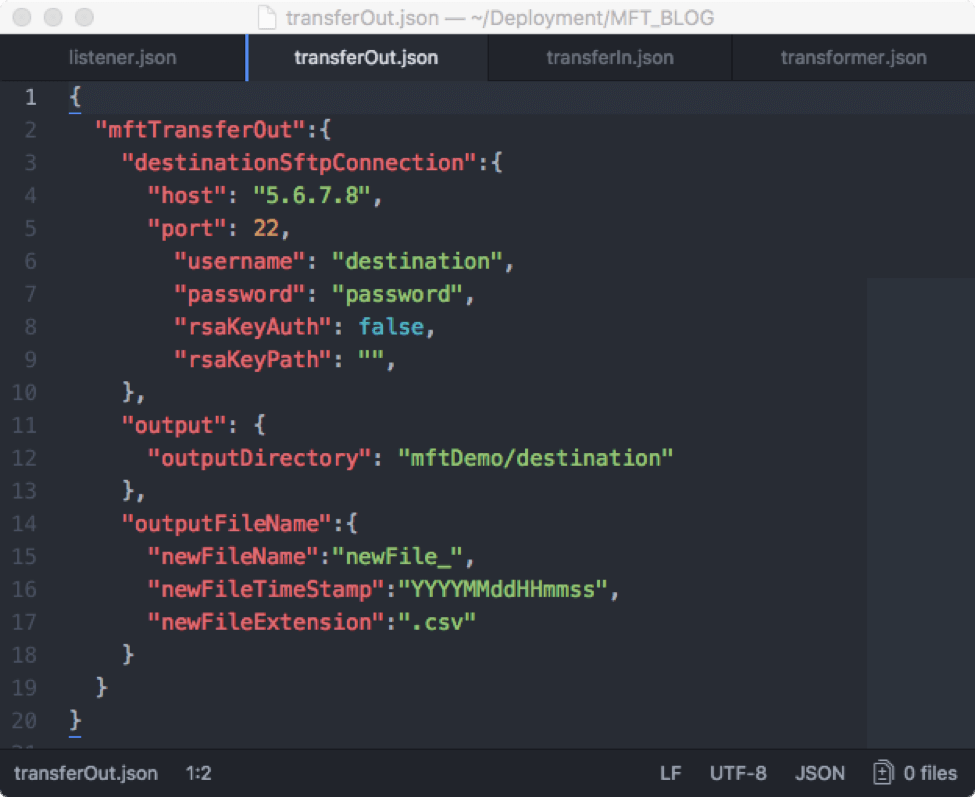
In the config of TransferOut, we need to provide the information about how to connect to the receiver’s sftp server. In the picture below, host is “5.6.7.8”, port is 22, the username is “destination”. If “rsaKeyAuth” is “false”, then “password” will be used, if “rsaKeyAuth” is “true”, the “rsaKeyPath” will be used, and the rsa key should be provided by the receiver. After the transformation is completed, TransferOut will go to our internal sftp server to pick up the transformed file and transfer to the “outputDirectory”. If the user also want to rename the file in the destination, the user needs to provide the “newFileName”, “newFileExtension” and “newFileTimeStamp” to rename the original file. So based on the picture below, the output file name would be, for example: “newFile_20170710154012.txt”.
